How to Switch from Listonic to GroceryBudget
A step-by-step guide to moving from Listonic to GroceryBudget — what changes in your workflow, what you gain, and what you lose.
Key Takeaways
• The switch takes one shopping trip to set up and 2-3 trips for price memory to kick in.
• There's no data import — you start fresh, but templates make it a one-time cost.
• You lose recipe import, web access, and Android support — GroceryBudget is iOS only.
• You gain real-time budget tracking, no ads, no account required, and offline support.
If you've already read our Listonic alternative comparison, you know the why: no budget tracking, ads in the free tier, account required. This post is purely the how — a practical walkthrough for making the switch.
Before You Start
Keep Listonic installed for now. You'll reference your existing lists during setup.
GroceryBudget is iOS only. If anyone in your household uses Android or relies on Listonic's web version, they won't be able to switch. That's the biggest trade-off — decide if it's a dealbreaker before investing time.
Step 1: Download and Create Your First Cart
Get GroceryBudget from the App Store. Open it — no account creation, no onboarding screens.
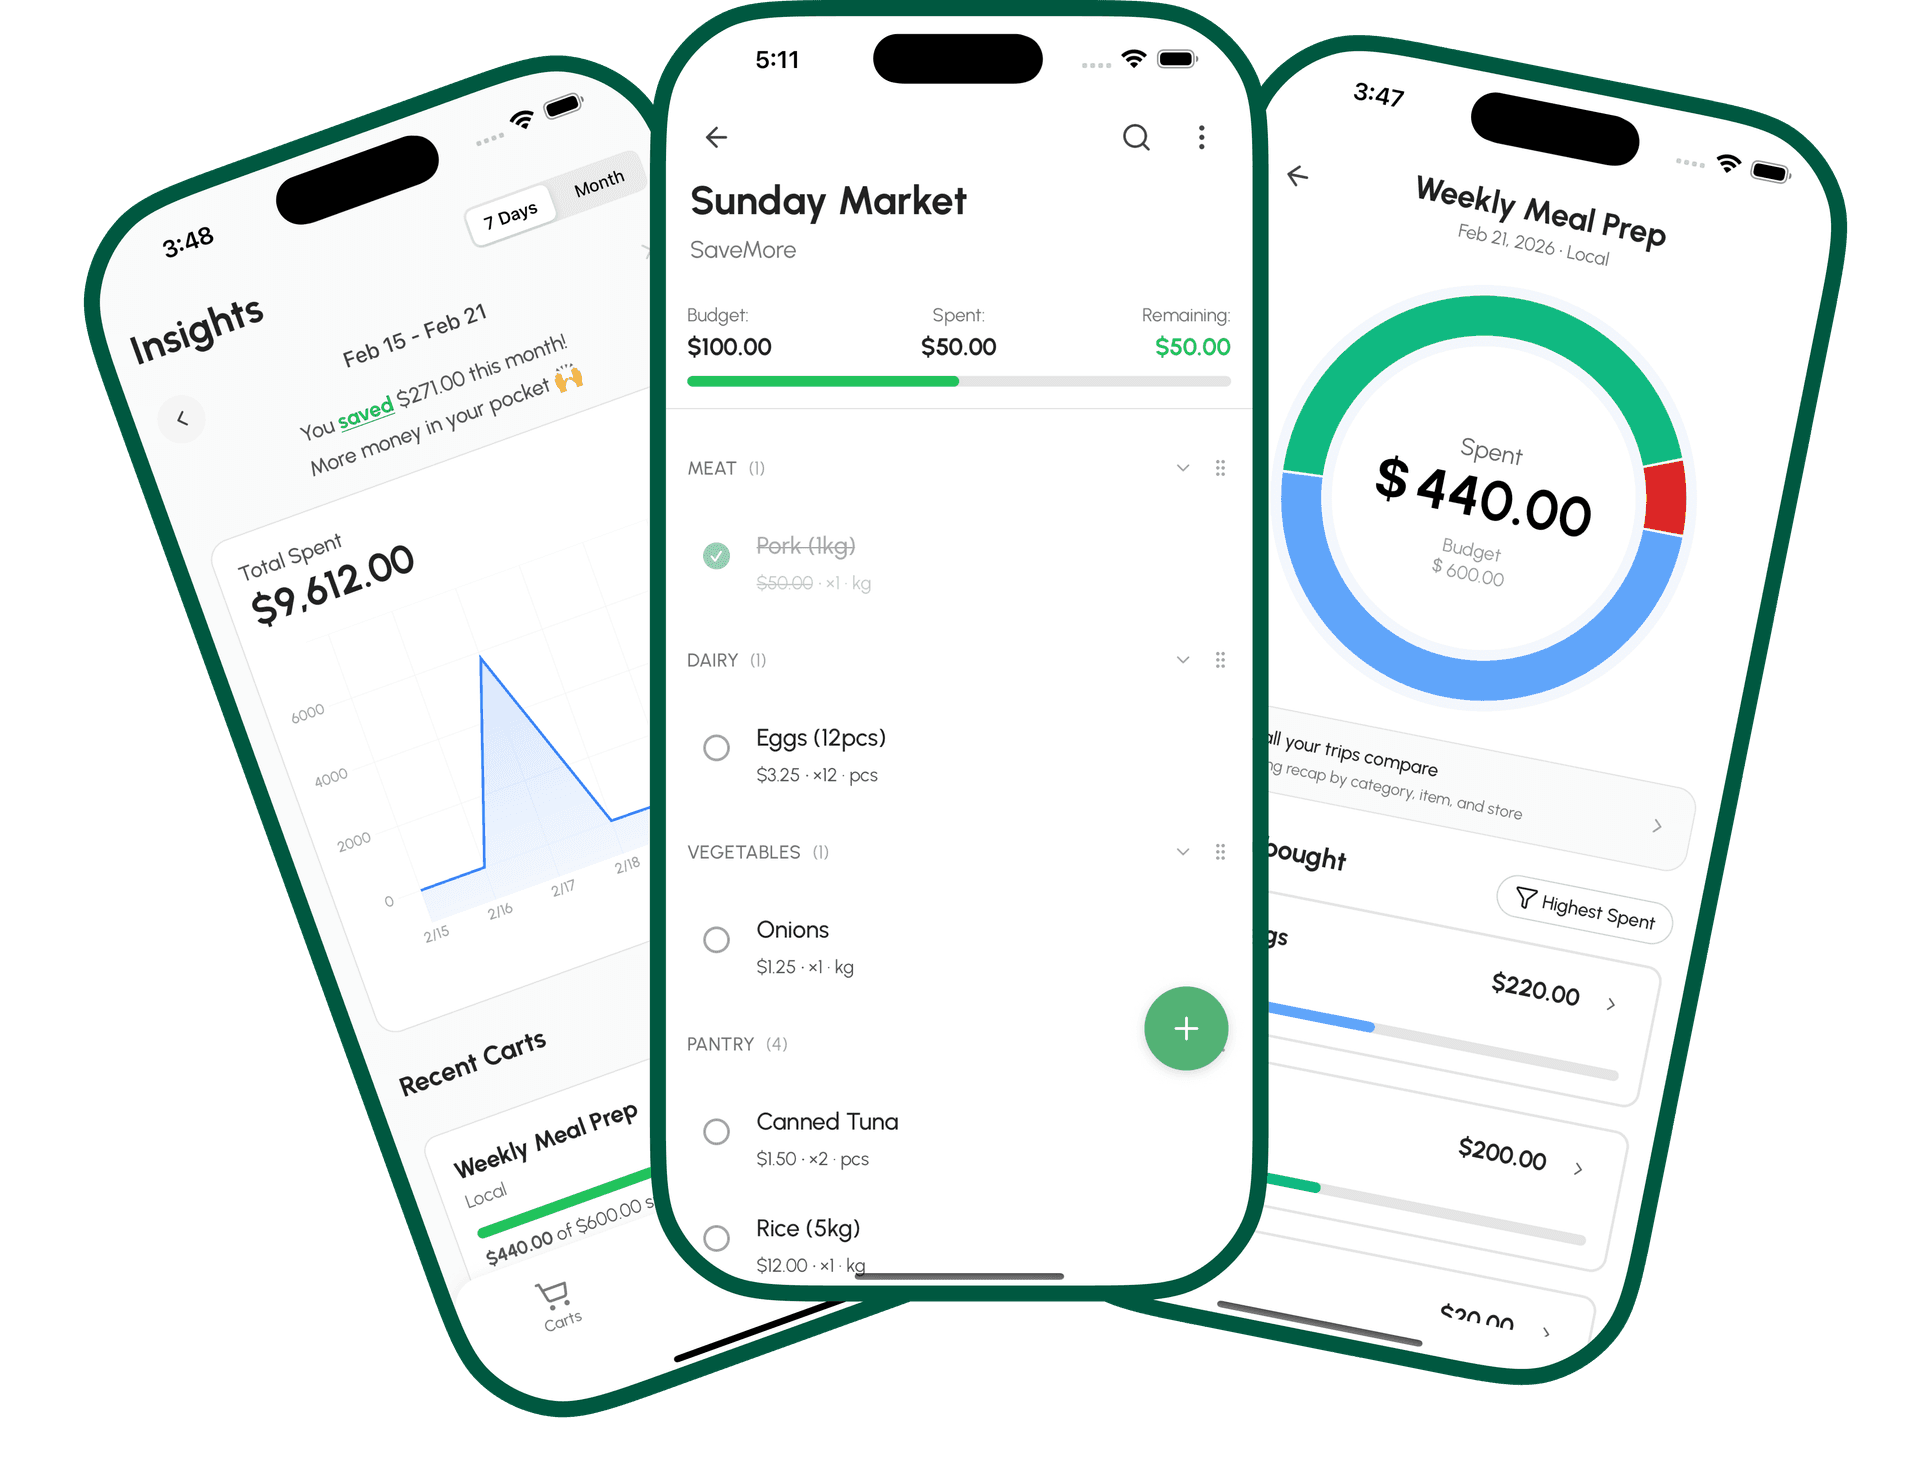
Tap + to create a new cart. Set your store name and a budget for the trip. This is the fundamental difference from Listonic: every cart starts with a spending limit.
Step 2: Rebuild Your Usual List
Open your most recent Listonic list. Add those same items to your GroceryBudget cart. Enter prices where you know them — skip what you don't. You'll fill in accurate prices at the store.
This takes about 10 minutes. It's the only time you'll do it manually.
Step 3: Save as a Template
Once your standard items are in, save the cart as a template. This replaces Listonic's recurring list. Next week you create a new cart from the template — one tap instead of rebuilding from scratch.
Step 4: Shop With Your Budget
At the store, check off items as they go in your physical cart. GroceryBudget updates your running total and shows remaining budget. When you're approaching your limit, you know before checkout.
This is what Listonic can't do. You had a list; now you have a list with a financial guardrail.
Step 5: Let Price Memory Build
After 2-3 trips, GroceryBudget remembers what you paid for items and auto-suggests prices. Your templates become more accurate. Budget estimates get reliable.
By week three, your workflow is faster than it was in Listonic because prices auto-fill.
What You Gain
- Real-time budget tracking — running total as you shop
- Price memory — auto-fill prices after a few trips
- No ads — free tier is clean, no banners or interstitials
- No account required — data stays on your device
- Spending insights — see where your money goes over time (7 days free, unlimited with Premium)
- Offline mode — works without internet
What You Lose
Be clear-eyed about the trade-offs:
- Recipe import — Listonic pulls ingredients from recipe URLs. GroceryBudget doesn't.
- Web version — Listonic works in a browser. GroceryBudget is mobile only.
- Android support — anyone on Android can't use GroceryBudget.
- Cross-platform sharing — Listonic shares across iOS/Android/web. GroceryBudget's Family Sharing (Premium) is iOS only.
The Transition Period
The first trip takes longer than normal — you're learning a new app and entering prices manually. By trip two, it's faster. By trip three, price memory handles most of the work and templates mean you're not rebuilding lists.
If you want the full feature-by-feature breakdown, see GroceryBudget vs Listonic.
Download GroceryBudget — free, no account needed.